More often than I care to admit, I take on a project for which I severely underestimated the amount of time it would take. Usually, it’s when my husband and I decide to entertain our Desi friends, and I want to make homemade Indian food for our loved ones far away from their homes. I’ll let him know that day, after we’ve made the plans for friends to come over, that I plan on putting out a dinner spread and that we need to go to one of our small city’s two Indian markets. He’ll politely remind me that many curries and dishes we like to cook take hours longer to prepare than the recipe states, and I’ll insist that “things are different this time”. Spoiler alert: they are never different this time. But, even though he knows that, the man has more patience in his left pinky than I’ll ever possess in my lifetime, so he resigns and accompanies me to the store. And, when it’s 10:00 pm and dinner still isn’t on the table, he politely finds snacks in the pantry, replenishes everyone’s drink, and assures me that late dinners are very common in Indian culture and that no one is upset. He usually refrains from the “I told you so” comments, but that depends on how stubborn I was earlier.
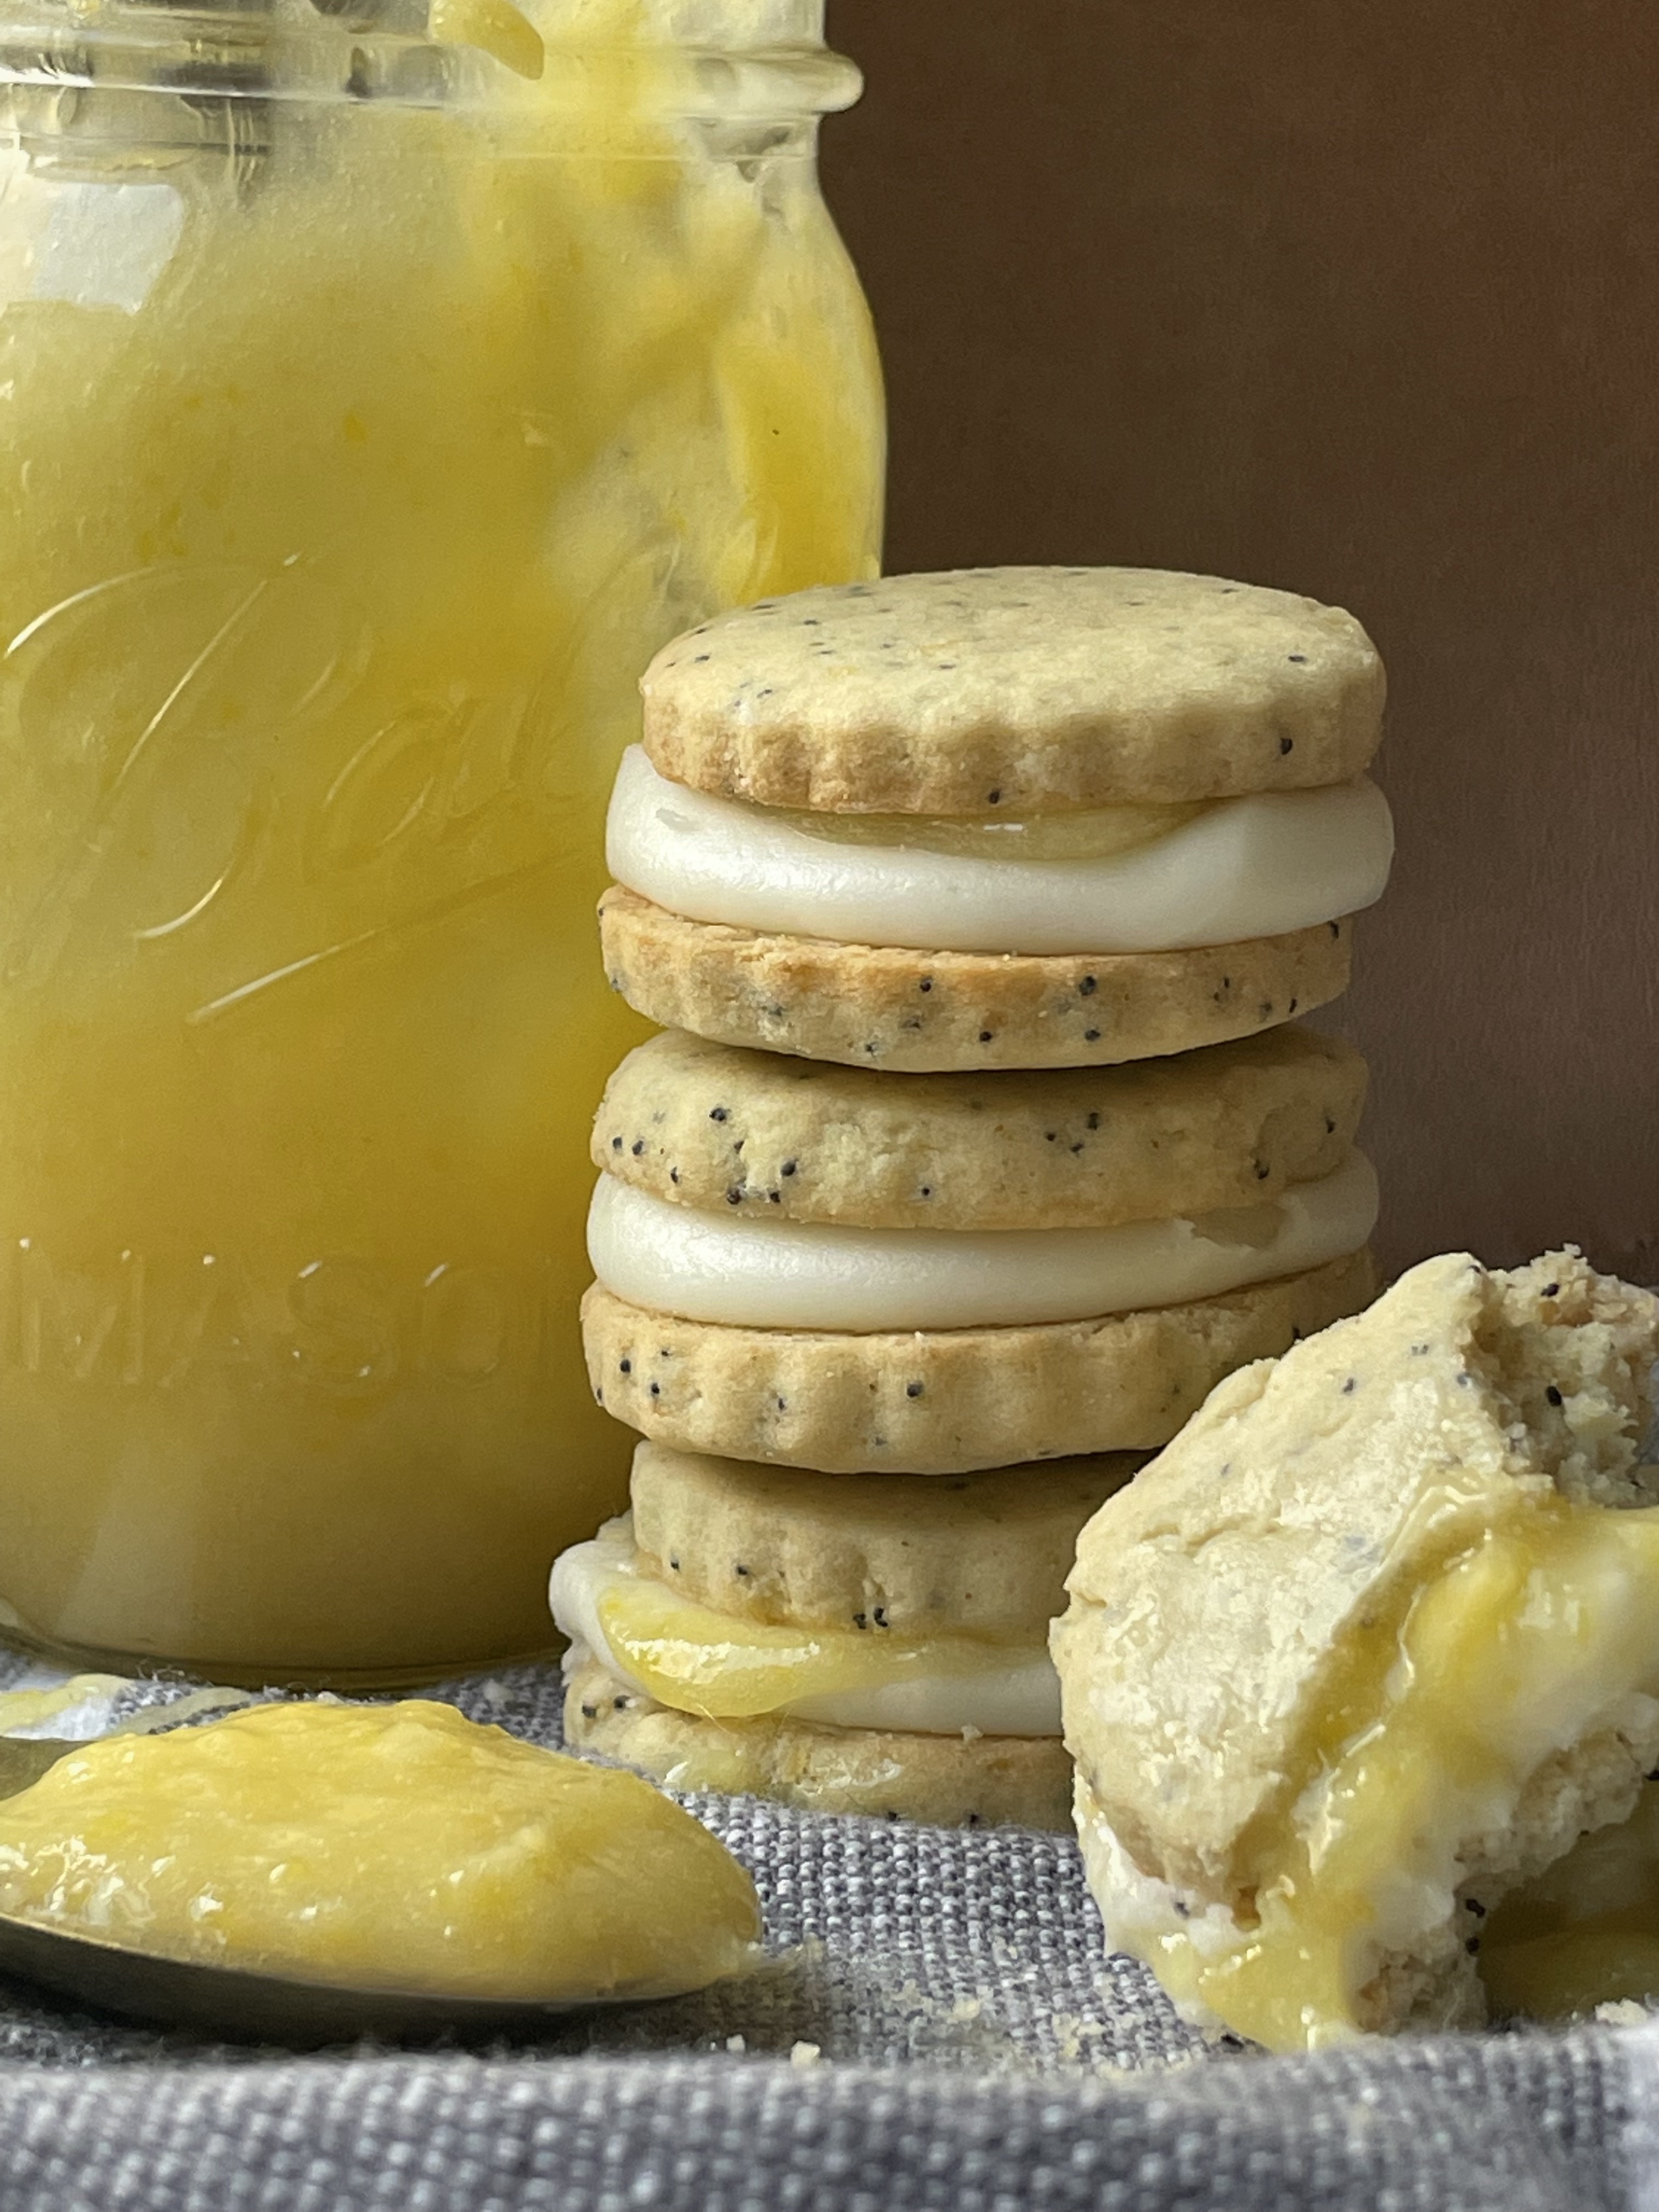
These lemon poppyseed butter sandwich cookies, that I decided to make entirely from scratch during the week I was taking on a new client, prepping to host Easter brunch with my family, and still working really hard to be good at my day job, were the perfect example of me underestimating the time it would take to make them. However, it was important to me to make them for two reasons: one of my best friends in the entire world is pregnant and was craving them, and they were so beautiful and springy I just had to create them. Overall, the recipe took me 3.5 days to create, with lots of other labor stuck in between cookie sessions. But, when my pregnant cousin told me they were “so good that she was going to cry” and when I finally nailed a photo of my food that looked like it belonged on a food blog, I knew that I had chosen the right project to take on amidst the rest of my chaos.
I adapted this recipe from Dash of Grace (www.dashofgrace.com) and it provided the best possible template to create these. While I put several spins on this recipe from the original, I do want to note that the idea for them is not original and can be contributed to this very talented food blogger.
One thing I have to recommend, however, is to make your own lemon curd rather than the store bought version. It can be so intimidating, without a doubt, to try and create something that requires such a specific texture, but I promise that you can do it. And the results are oh, so worth it. I also recommend making a fairly thick buttercream to help avoid spills out of the side between the two cookies. It is also important to note that I made mine gluten-free, and to be honest, I feel that the shorter flour really contributed to the shortbread/butter cookie feel of the cookie nicely. Since gluten is not present, there is not that development of glutinous fibers and therefore no “chewy” factor to the cookie as you might find using regular, all-purpose flour. Of course, this is not a requirement, and no one’s ever been upset about a cookie that had some chew, but if you’re looking to experiment or have a dietary restriction as is, then this recipe is perfect for it!
The last tip I’ll give, because I don’t believe in making you read my life story before you see the recipe, is to get yourself a food scale. Seriously, this one on Amazon is on sale right now for $10 and not only will it make your life so much easier with quicker measurements and fewer dishes to wash (just put your mixing bowl on the scale, zero it out, and add what you need to until you reach the proper weight), but it will make your baking better because measuring out 240 grams of flour will always be more accurate than trying to properly fill and scoop two cups of flour. Less mess, better results. How can you lose?
Lemon Poppyseed Butter Sandwich Cookies
Cookies:
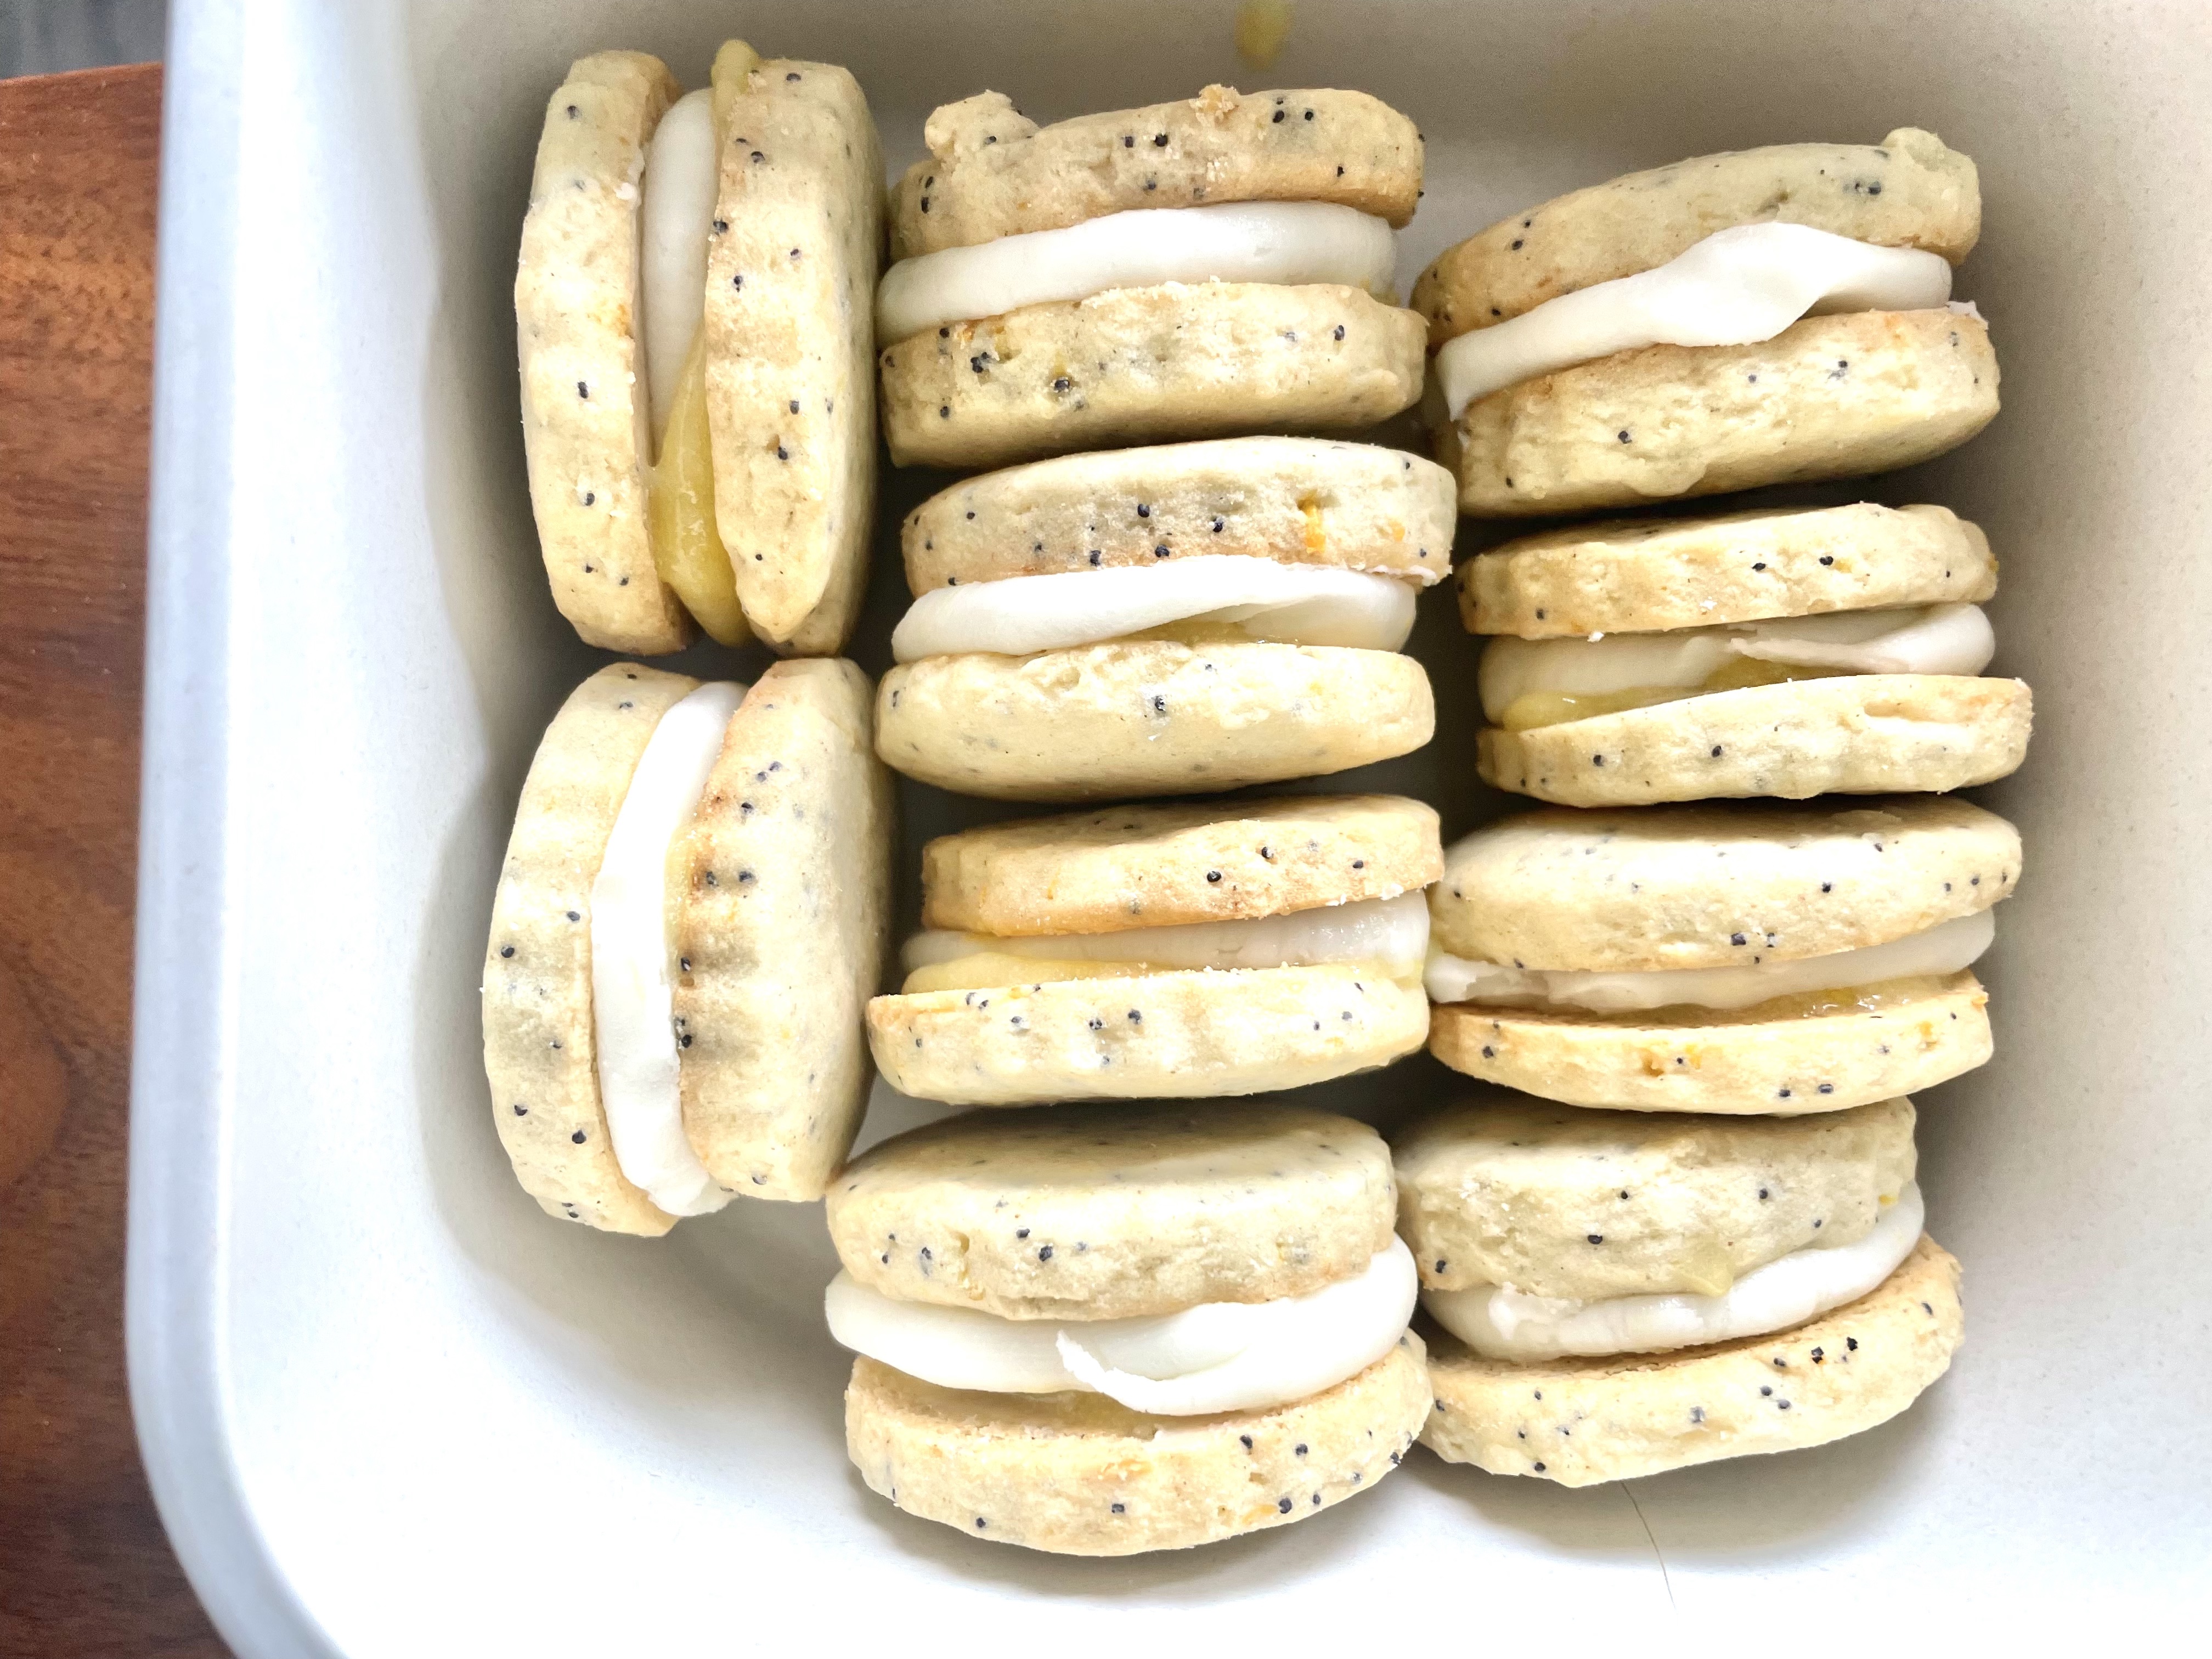
recipe makes roughly 2.5 dozen sandwich cookies, or 60 cookies from this dough
- 360 grams (3 cups) of Krusteaz gluten-free all-purpose flour (can also use regular all-purpose flour)
- 1 tsp salt
- 1/2 tsp baking soda
- 30 grams (1/4 cup) cornstarch
- 1 cup (two sticks) of unsalted butter, room temperature
- 125 (1 cup) grams powdered sugar
- 1 tsp vanilla extract
- 1 egg plus 1 large egg yolk, room temperature
- 2 tbsp lemon zest
- 1 1/2 tbsp poppyseeds
At least two hours and up to 24 hours before you want your cookies to be ready to assemble, make your dough.
In a medium bowl, whisk together the flour, salt, baking soda, and cornstarch. In the bowl of a stand mixer fitted with the paddle attachment or in a large bowl you’ll use a hand-mixer in, beat together the butter and powdered sugar until fluffy, 2-3 minutes. Then, add your vanilla extract and your egg + egg yolk and beat together until well incorporated, another 2-3 minutes, pausing to scrape down the sides as needed. Here, it’s very important that you started your ingredients at room temperature. if you didn’t, then your eggs might cool pieces of your butter and it will not be an evenly mixed mixture. If that happens, please don’t panic or even mix too much more, your dough will likely still be able to come together once the dry ingredients are added. However, best to save yourself the stress and keep everything at room temperature. Next, add the lemon zest and let it incorporate just barely before adding in your dry ingredients in three portions, mixing well and scraping down the sides after each portion. Once your dough has come together, add your poppyseeds, turn the dough onto patch of plastic wrap, and wrap it up tight into a large ball and put in the fridge to firm up for at least 2 hours and up to 24.
While your dough is chilling, especially if you plan to draw this process out over the course of a day or two, you can make the lemon curd and the vanilla buttercream any time in this process.
Once your dough has chilled preheat your oven to 350 degrees Fahrenheit and roll your cookies out to 1/4 inch thick. The dough will be very stiff, so it helps to hit the round ball a few times with your rolling pin to flatten it. Cut into small circles with a 1 inch round cookie or biscuit cutter and transfer to a baking sheet lined with a silicon mat or parchment paper. Freeze the cookies for 10 minutes and place directly in the oven. Bake for 12-13 minutes, until just barely golden brown on the sides. Keeping your dough as cold as you can, both in between rolling out your cookies and putting them in the oven, will help them to keep their shape and deliver the crunchy buttery goodness we’re looking for. When you collect the scraps that weren’t part of the cut out cookies, be sure to ball them up and put them in the freezer for at least 10 minutes before re-rolling and repeating the process. Follow the rule of not rolling dough unless it’s chilled for at least 10 minutes first, and not putting it in the oven unless it’s also been chilled for the same time. Repeat the process until you’ve used up all of your dough.
Lemon Curd:
You will need a double boiler for this, or at the very least, two different sized saucepans that can stack on top of each other with their bottoms still being at least three inches apart when stacked. (I use the latter and I do just fine).
- 4 large egg yolks
- 135 g (2/3 cup) sugar
- 1 tbsp lemon zest
- 85 ml (roughly the juice of 4-5 small lemons, or 1/3 cup) freshly squeezed lemon juice
- 1/4 tsp salt
- 6 tbsp unsalted butter, roughly cut into tablespoons
Ok, here you’re going to do a lot of stirring. It’s a little labor intensive, but if you can accept the fact that 10 minutes is all it’ll take for you to have mastered the art of lemon curd, then I promise the fruits of your labor will be well worth it. First, take the bottom of your double boiler (or the smaller of your two saucepans) and fill with about 3-4 inches of water (can be more if space allows, the water just cannot touch the bottom of the top saucepan).
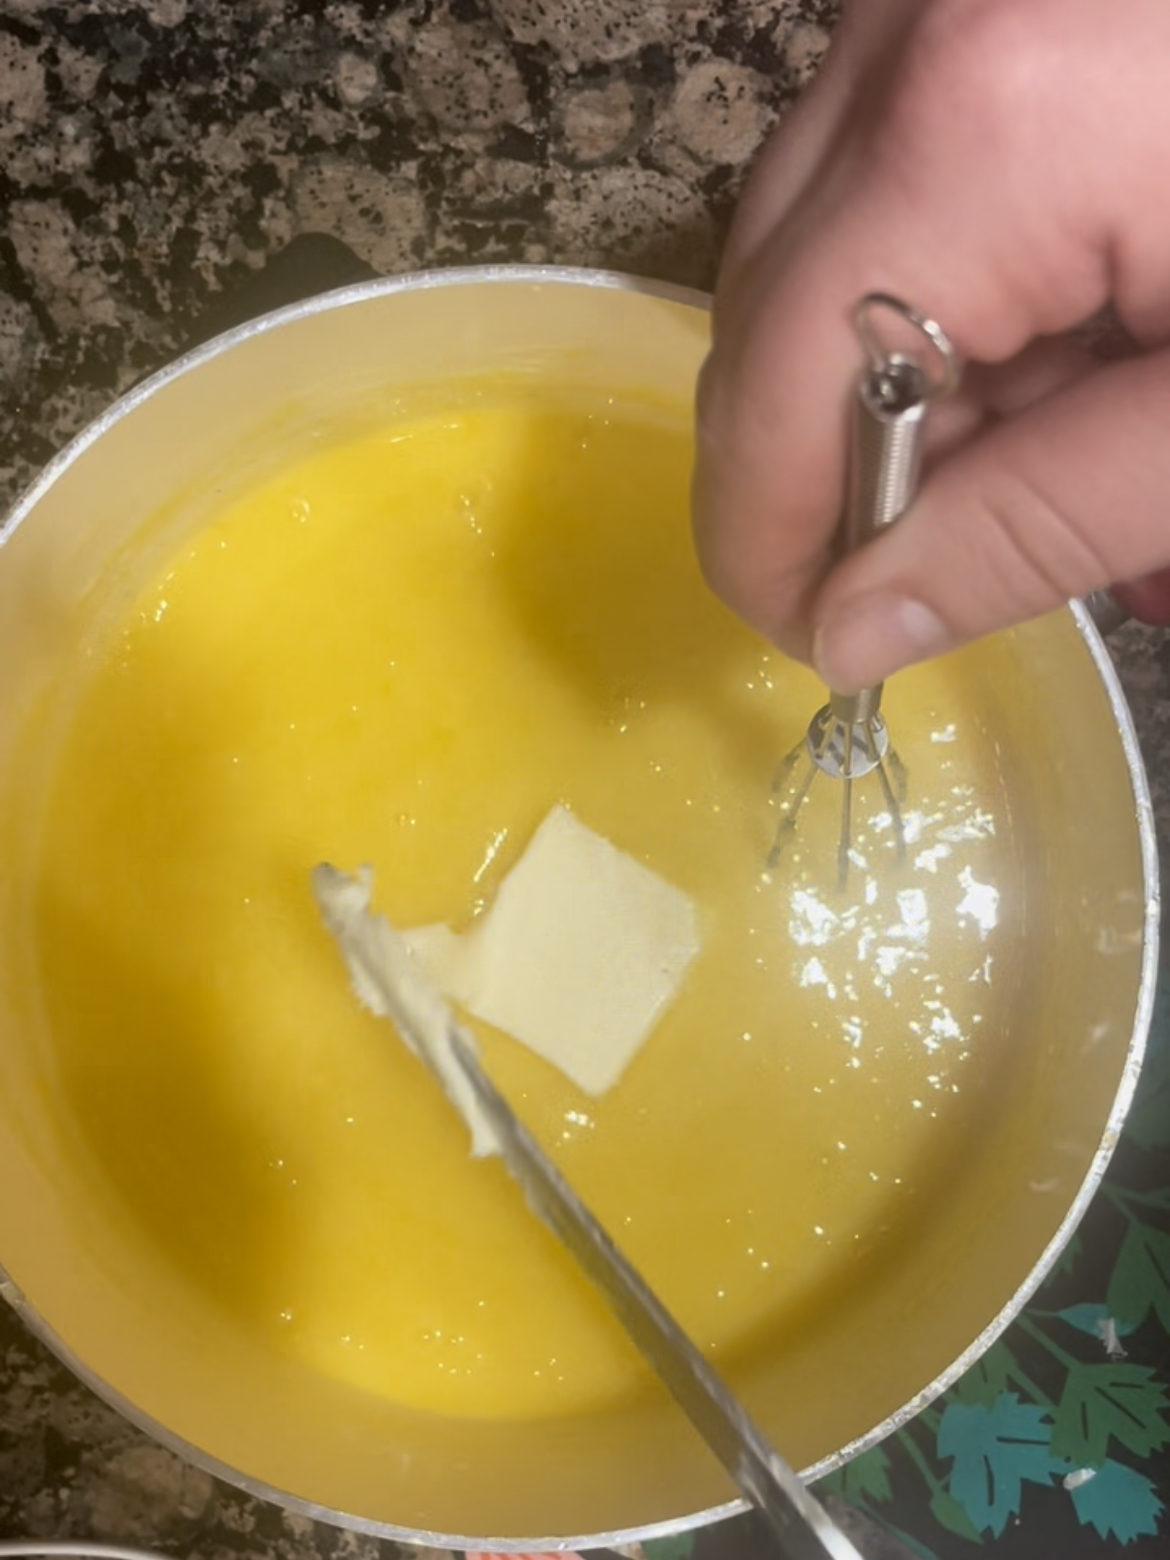
Heat over medium high heat and bring to boil, then reduce to keep it at a simmer. In your bigger of the two saucepans, combine every ingredient but the butter. Place this saucepan on top of the one with the water, and get to whisking. Of course, you can take small breaks, but for the most part you’ll want to keep a steady stir for about 11-12 minutes. If you don’t, not all of your ingredients will emulsify properly and you’ll be stuck with the dreaded sweet and tangy scrambled eggs. Stir constantly until the mixture has paled and thickens just enough so that when you drag the whisk through the bottom of the pan (as if you’re parting the seas), you can see the bottom of the pan for a moment before the mixture comes back together.
You can also test its thickness by dunking a spoon in it. If you lay dip the back of a spoon in your mixture it even coats it in one shiny, beautiful layer, you are ready to remove from heat. Once removed from head, add a tablespoon of butter and mix until completely melted and incorporated into the mixture. Repeat this process until all of your butter has been mixed into the curd. Pour into a heat proof jar, refrigerate when cool, and enjoy for up to two weeks!
Note that this recipe will make more lemon curd than you need for the cookies. You can use your leftovers as a cake filling, you can mix it into your yogurt for a yummy fruit dip, you can spread it on your favorite pastries, and you can most definitely eat it by the spoonful because tomorrow is never promised, my friends, and you deserve to.
Vanilla Buttercream Filling:
- 1/2 cup unsalted butter, room temperature
- 375 grams (3 cups) powdered sugar
- 1/2 tsp salt
- 1 tsp vanilla extract (for extra deliciousness, halve this and then add 1/2 tsp of almond extract, if allergies aren’t a spoilsport)
- Heavy cream, as needed (likely only a tablespoon or two)
In a stand mixer fitted with a paddle attachment or a large bowl if you intend to use a hand-mixer, beat the softened butter until paler in color and fluffy, about 2 minutes. Add the sugar one cup at a time and mix well after each addition, scraping down the sides as needed. Once completely combined, add your vanilla and/or almond extract and salt, and mix until fully incorporated. This baby will be THICK. Add the heavy cream, a splash at a time, until your frosting looks almost thin enough to spread easily, but you’ll still want it to hold its shape pretty well enough that it wouldn’t slip or slide once you pipe it. If you add too much cream, you can add in additional powdered sugar until it reaches the desired consistency. If you aren’t frosting your cookies immediately, refrigerate until you’re ready. If you are, transfer icing to a plastic baggy with the corner cut off to make approximately a 1/4 inch opening, or a piping bag fit with a round piping tip (anything from about 1/4 inch-1/2 inch will work.
Assembly:
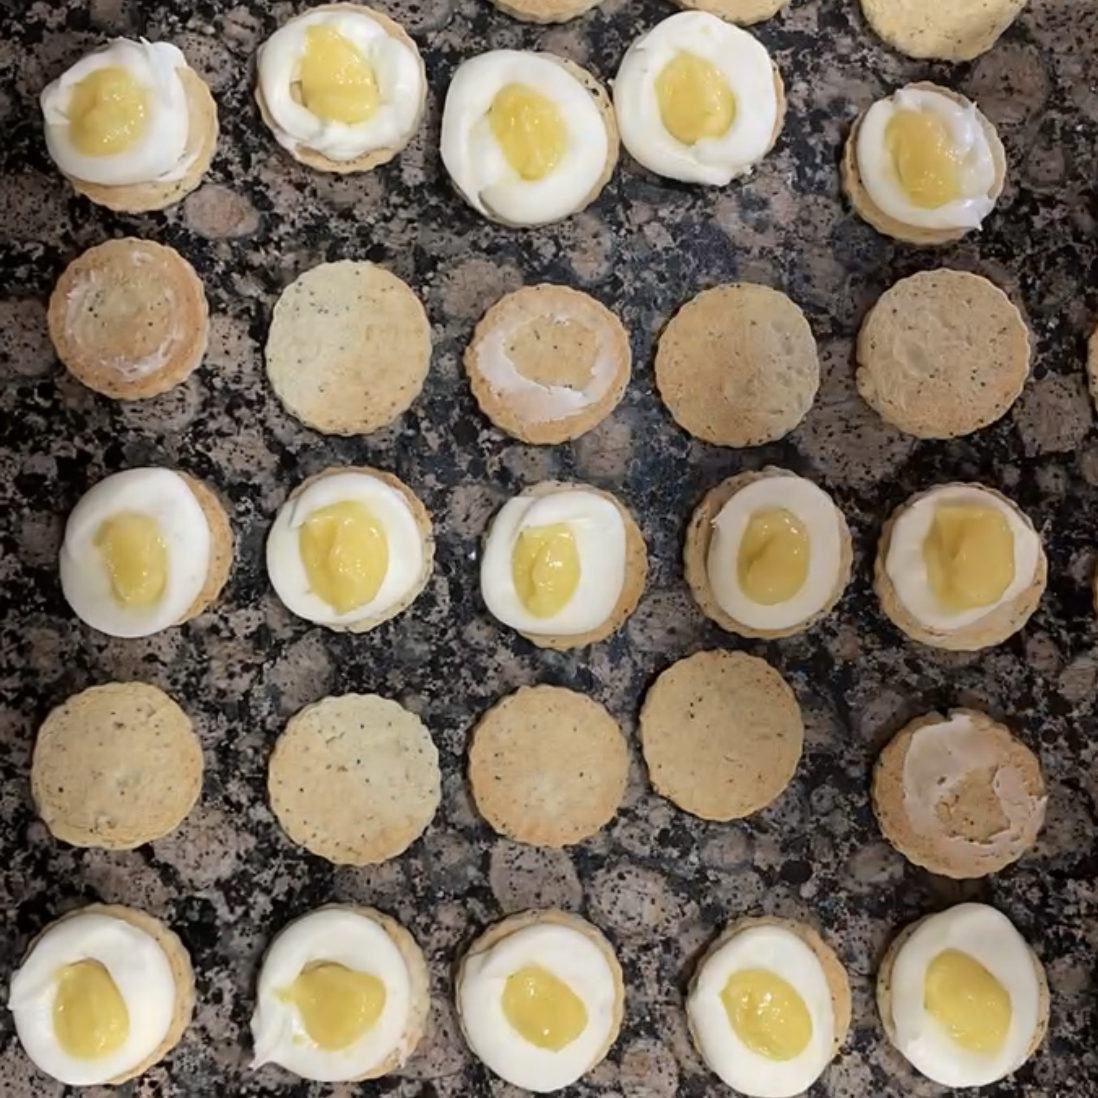
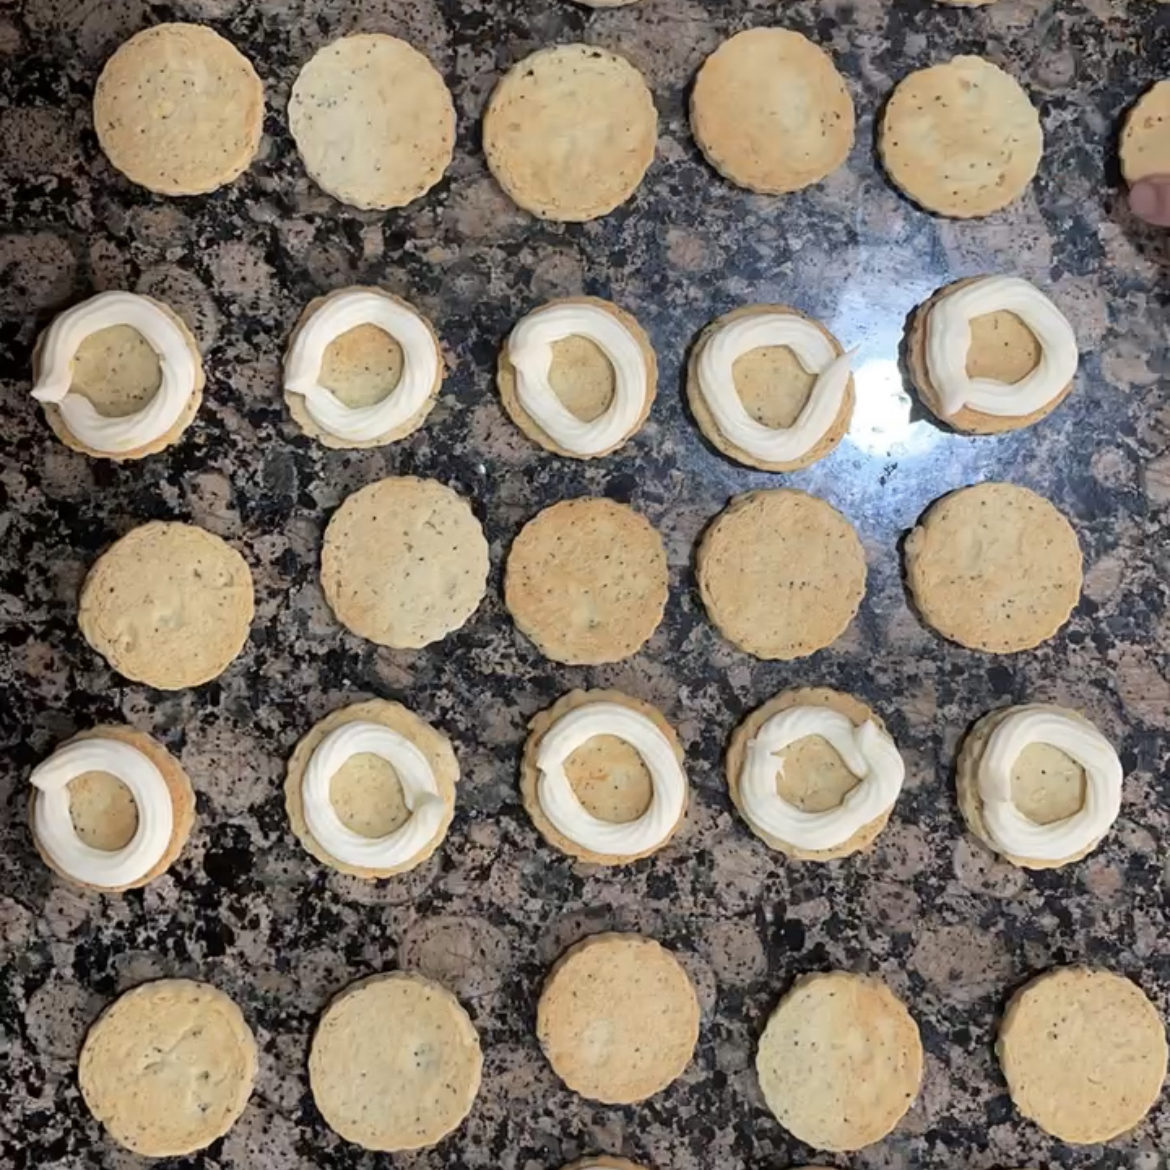
- To assemble, lay out all of your cookies bottoms up in a grid. Pipe every other cookie with a ring of buttercream around the edge of the cookie (you may need to soften your buttercream in the bag with your hands if it has previously been chilled). Next, use a two small spoons to scoop about a teaspoon of lemon curd with the first one and drop into the middle of the frosting ring by scraping it off of the first spoon with the second. Once every other cookie has been filled with both fillings, top with the bare cookies and enjoy! Store cookies in the fridge in an airtight container and see if they can last as long as the 7 days you can keep them there.
